Edit/Export
Prospect Information
This feature
is available to Manager users only.
The Edit/Export Prospect Information feature allows you to perform three
different tasks. Each
task gives you the opportunity to either make changes to multiple prospects
at one time or to gather information about multiple prospects at one time.
Click the
following links to learn more about each task and its purpose:
Change Prospects' Sales Status
Reassign Prospects to Another Salesperson
Export Prospect Information
Change Prospects' Sales Status
The purpose of the Change Prospects' Sales Status task is to update
the sales status of one or more prospects based on specific criteria selected
by you. For
example, if you want all prospects assigned to a specific salesperson
to be moved from one status to another, you can change them all at one
time using this feature.
To complete the Change Prospects' Sales Status task:
Click the Tools
tab.
From the Batch
Activities section, click Edit/Export
Prospect Information.
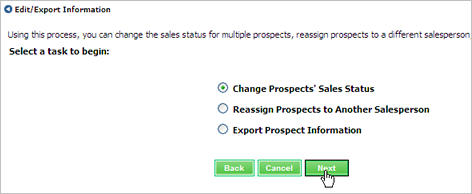
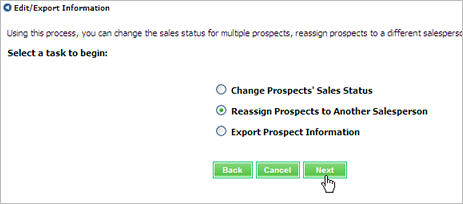
Select Change
Prospects' Sales Status, and click Next.
In Step 1: Select
Dealership/Salesperson Information, select the Dealership
(if applicable) and the Salesperson(s)
whose prospects' status need updated. Click
Proceed to Step 2 of 5.

back
to the top
In Step 2: Select
Sales Statuses, select the Current
Sales Status of the prospects and the New
Sales Status of the prospects, and click Proceed
to Step 3 of 5.

|
Important Note:
Prospects
moved to a new status by the Edit/Export process will not
trigger sales processes based on sale statuses. The
New Sales Status cannot be a group
(ACTIVE, ALL LOST, etc.). If
you select a group, the prospects will not update correctly.
|
In
Step 3: Find Prospects, choose your search criteria to find the
prospects whose status you want to change, and click Proceed
to Step 4 of 5.

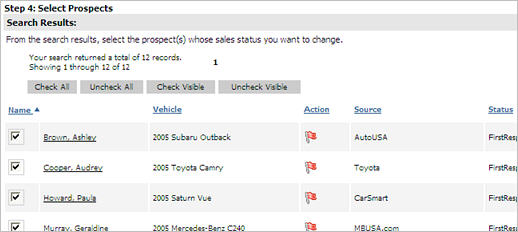
In Step
4: Select Prospects, select the prospects whose status you want
to change, and click Proceed
to Step 5 of 5.
|
Important Notes:
All
prospects are selected by default. If
you do not want to change a status, clear the check box next the prospect's
name, or use the Check and Uncheck buttons that display above the
Search results to select and clear check boxes. Click
the column headers to sort the Search Results. By
default, the results are sorted by last name.
|
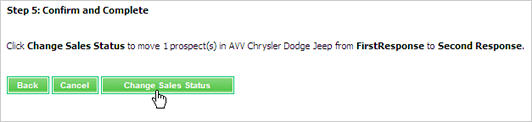
In Step
5: Confirm and Complete, click Change
Sales Status to change the prospects' status.
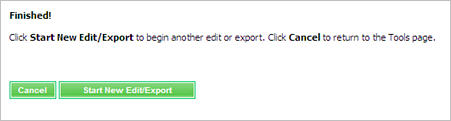
When the change is
complete, click Cancel to return
to the Tools page, or click Start New/Edit
Export to begin a new edit or export.
back
to the top
Reassign Prospects to Another Salesperson
The purpose of the Reassign Prospects to Another Salesperson task is
to update the Salesperson assignment of one or more prospects based on
specific criteria selected by you. For
example, if you have a salesperson who is taking on a new role in the
dealership and no longer will work directly with prospects, you can reassign
all prospects to another salesperson at one time.
To complete the Reassign Prospects to Another Salesperson task:
Click the Tools
tab.
From the Batch
Activities section, click Edit/Export
Prospect Information.
Select Reassign
Prospects to Another Salesperson, and click Next.
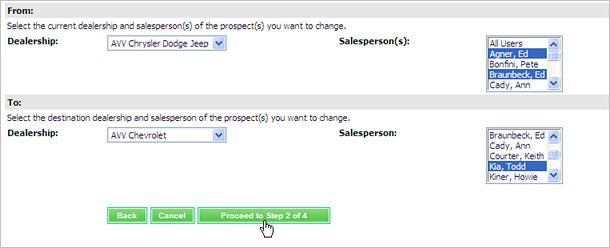
In Step 1: Select
Dealership/Salesperson Information:
In the From
section, select the Dealership
(if applicable), and the Salesperson(s)
whose prospects you want to move.
In the To
section, select the Dealership(if
applicable), and the Salesperson to
which the prospects will be assigned. You
can only reassign prospects to one salesperson at a time.
Click Proceed
to Step 2 of 4.
back
to the top
In Step 2: Find
Prospects, choose your search criteria to find the prospects whose
assignment you want to change, and click Proceed
to Step 3 of 4.

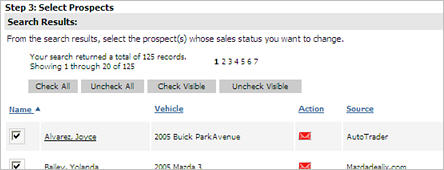
In Step
3: Select Prospects, select the prospects whose assignment you
want to change, and click Proceed to
Step 4 of 4.
|
Important Notes:
All
prospects are selected by default. If
you do not want to change a status, clear the check box next the prospect's
name, or use the Check and Uncheck buttons that display above the
Search results to select and clear check boxes. Click
the column headers to sort the Search Results. By
default, the results are sorted by last name.
|
In Step
4: Confirm and Complete:
If applicable,
select a new sales status for any prospects whose status will not match
when it is reassigned (The list of sales statuses only appears when a
new status needs selected, and this typically occurs when reassigning
from a salesperson in one dealership to a salesperson in another dealership).
Click Reassign
Prospects.

When the reassignment
is complete, click Cancel to return
to the Tools page, or click Start New/Edit
Export to begin a new edit or export.
back
to the top
Export Prospect Information
The purpose of the Export Prospect Information task is to create a file
that includes prospect information for one or more prospects.
To complete the Export Prospect Information task:
Click the Tools
tab.
From the Batch
Activities section, click Edit/Export
Prospect Information.
Select Export
Prospect Information, and click Next.

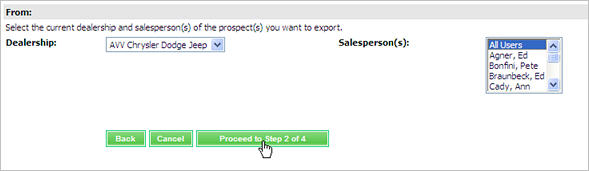
In Step 1: Select
Dealership/Salesperson Information, select the Dealership
(if applicable) and the Salesperson(s)
whose prospects you want to export to a file. Click
Proceed to Step 2 of 4.
In Step 2: Find
Prospects, choose your search criteria to find the prospects you
want to export, and click Proceed to
Step 3 of 4.

back
to the top
In Step 3: Select
Prospects, select the prospects for the export, and click Proceed to Step 4 of 4.

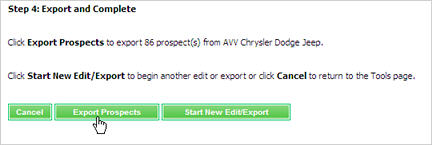
In Step 4: Export
and Complete, click Export Prospects
to create the file.
Click Save
to save the file.
|
Important Note:
It is best to chose Save
instead of Open when exporting prospects. If
you save the file, you can open it outside of Web Control and work with
data more easily.
|
Click Cancel
to return to the Tools page, or click Start
New/Edit Export to begin a new edit or export.
back
to the top
Revised: March 2010