Click the Settings link.
From the User Settings section, click Add/Edit Auto Response Template.
From the User
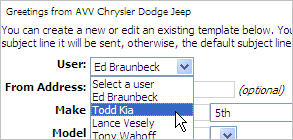
list, select the user whose templates you want to view.

Use Auto Response Email templates to create general or unique responses that are automatically sent to prospects.
Standard users can create, edit and delete their own Auto Response Email templates, and they can schedule delivery times for their own Auto Response Email messages.
Manager users can create, edit and delete Auto Response Email templates for any user in the dealership. They can also schedule delivery time for any users' Auto Response Email messages.
Select a User (Manager Users only)
Create an Auto Response Email Template
Edit an Auto Response Email Template
Delete an Auto Response Email Template
Schedule Delivery Times for Auto Response Email Messages
Manager users have access to their own Auto Response Email templates and the templates of any other user in the dealership.
Click the Settings link.
From the User Settings section, click Add/Edit Auto Response Template.
From the User
list, select the user whose templates you want to view.

|
Note: If the selected user does not have any templates created, the screen that allows you to create an Auto Response Template displays.
|
Create a single template to use any time you receive a message from a prospect, or create several templates to customize your response based on prospect information like vehicle make, model or year.
Click the Settings link.
From the User Settings section, click Add/Edit Auto Response Template.
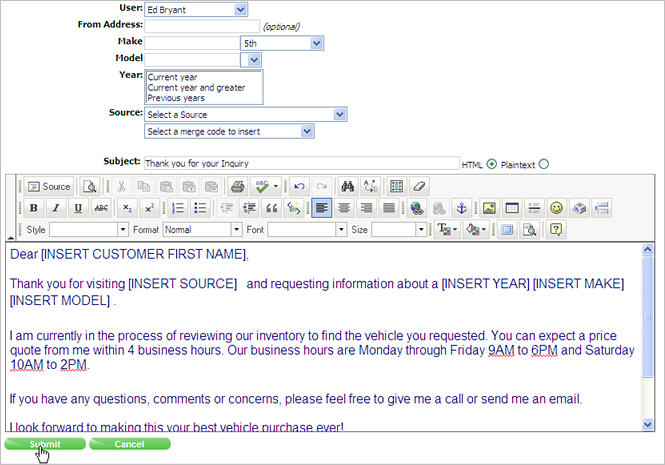
If you are a Manager user, select the user from Users list for whom you want to create the template.
In the From Address box, type an email address only if you want to the message to display a From address different than your Web Control email address ([email protected]).
For Make, Model, Year and Source, select values to specify the criteria you want met for the message to be sent.
|
Examples:
|
From the Template list, select a template if you want to build your Auto Response from an existing Email template.
In the Subject box, type a Subject line for the message if you are not using an Email template from the list.
Build the message by typing and inserting Merge Codes from the list below the Source list.
Click Submit.

If you want to make any changes, such as different recipient criteria or message content, you need to edit the template.
Click the Settings link.
From the User Settings section, click Add/Edit Auto Response Template.
If you are a Manager user, select the user from the Users list whose template you want to edit.
From the list of previously created templates,
click the one you want to edit.

Make changes as desired to:
From Address
Make
Model
Year
Source
Subject
Message content
Click Submit.
If you no longer need a template, delete it from your list.
Click the Settings link.
From the User Settings section, click Add/Edit Auto Response Template.
If you are a Manager user, select the user from the Users list whose template you want to delete.
From the list of previously created templates,
click the one you want to edit.

Click Delete.

Click OK.
You can schedule your Auto Response email messages to be sent at all times or just at specific times.
Click the Settings link.
From the User Settings section, click Add/Edit Auto Response Template.
Create or edit an Auto Response template and click Submit.
Set the delivery times.
To schedule your Auto Response email messages
to be sent at all times, click
the check box above the preview of the template.

To schedule specific
times for your Auto Response email messages to be sent, click the
check boxes as desired in the Day/Time table.

Click Save.
Revised: March 2010