Email templates can increase response time and improve consistency of
messages sent from your dealership. Email
templates consist of a subject line and body of text that can be customized
before sending if necessary. Email
templates can also include merge codes that automatically add Prospect-specific
content to the message.
Web Control has some basic templates available, but you can also create
templates for individual or dealership-wide use.
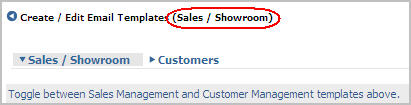
From the Templates
section, click Add/Edit EmailTemplates.
For dealerships that
use the Internet Sales and Customer portions of Web Control, verify or
change the module where you want to create the template.
Type a title for the
template in the Title field.
Type the subject line for the template
in the Template Subject field.
This is
the subject line the Prospect sees when they receive the email.
Notes:
The
Template Subject is what the Prospect will see in their Email Inbox. Use
words that get attention, but avoid words that might cause the message
to be classified as SPAM. See
Broadcast
Email Blockingfor more information on avoiding your message
being filtered out as SPAM.
The
Title line is what you see in the Template list. Use
words that will help you remember what the message is about.
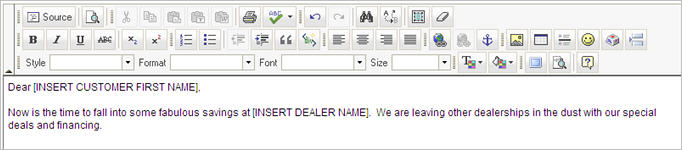
Type
the text of the email message in the text window. You
can also include merge codes and images to quickly personalize or add
visual interest to the message.
Notes:
Email
messages can contain a maximum of 8,000 characters. If
you are using HTML formatting, this includes the html code as well. You
can see HTML coding by clicking the HTML tab at the bottom of the message
window.
Email
messages can be a maximum of 2MB, including attachments. Messages
larger than 2MB cannot be delivered.
Do
not copy text or images from a web page and paste them into your text
window. Formatting
is often lost, extra characters may be added, and images will not display
correctly.
You
can copy a template from a Microsoft Word document. However,
you must first save the content as Web Page, Filtered (*.htm, *.html).
You
have the option of sending the message in HTML format or in Plain Text.
Plain text
does not support formatting or graphics.
At the end of the message, click Insert Signature to add your saved personalized
signature.
Note:
If the template will
be a Global template used by anyone in the dealership, you may not want
to include a signature. Instead,
you may want to be sure each Web Control user has a Personal Signature
created, which is added automatically to outgoing email and would be included
in the template when it is sent.
If
you are a Manager user and want the template to be available to everyone
in the dealership, select the Global
check box. Otherwise,
templates are only available to the user that created them and the manager.
Merge codes provide a way to quickly include personalized information
in templates based on the recipient's Prospect Details record.
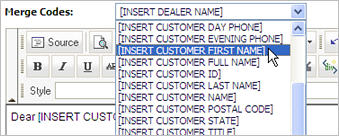
To insert a merge code:
In the body of the message,
place your cursor where you want to insert the merge code.
Fromthe Merge Code list, select
the code to insert.
Verify that the merge
code was inserted in the proper place.
Image Merge Code
For dealerships having both Inventory Downloads
and Internet Inventory Management, you may include an image of the specific
vehicle of interest in the email response to the prospect. The vehicle
stock number must be listed in the prospect's profile as the Vehicle of
Interest. This information can be added to the prospect information if
not included in the original lead by editing the Prospect
Detail window.
To insert the vehicle image:
Place your cursor in
the body of the email where you want the image to appear.
From the Merge
Code list, select the [INSERT
STOCK IMAGE] merge code.
Display the Flash content you want to use in a
new Internet browser window.
Click the View
menu in the Internet browser window and select Source.
A separate window with a Notepad document displays.
From the Notepad document, select all the text
and copy it. Note:
You can do this with keystrokes by using Ctrl+A
to select all the text and Ctrl+C
to copy it to the clipboard.
In Web Control,
open a new, blank template.
Type a Template
Subject and Title
in the appropriate fields.
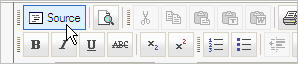
Click the Source
button in the toolbar of the Email Editor.
Place your cursor in the text window and paste
the information you copied to the clipboard by using the keystrokes Ctrl+V.
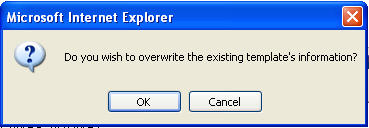
Click Save Template
to save the template.
Send the template to yourself as a test to verify
that it looks as expected.
To delete a template:
Note:
Manager users can delete all templates. Other
users can only delete templates they have created.
From
the Select Template list, select
the template you want to delete.